Saturday, December 6, 2014


Thursday, May 9, 2013
#10 Saltery Bay SCT parking lot & kiosk Winter 2013
 |
| About 300 m east of the Saltery Bay ferry terminal the new Sunshine Coast Trail trailhead parking lot is taking shape in January of 2013. Terry makes sure any traffic going past will be aware of the track hoe working on the side of Saltery Bay Mainline. |
 |
| Jimmy volunteered to operate the track hoe and Mark donated the use of the machine to level the area for the parking lot. |
 |
| Trucks bring loads of crushed granite which Jimmy distributes with the deftness of an artist. |
 |
| The job is done. We have a fabulous parking lot that can accommodate about a dozen cars. |
 |
| Next step is the pre-manufacture of the trailhead welcome and information kiosk. Jim and Richie do a dry-fit of post, beam and gusset. |
 |
| Craig, Terry, Richie and Jim receive a visit from Xinmin Yan, a journalist from Beijing writing a story about the Sunshine Coast Trail. |
 |
| Craig uses his electric chainsaw to rough in the holes. |
 |
| Terry and Richie fine-tune the holes with chisels. |
 |
| Action back at the parking lot: The four footings have cured and are ready to be built on. Earlier we built forms and and poured the concrete. Here the crew is enlarging and flattening the area around the kiosk location, and spreading more gravel that was delivered on that day. |
 |
| Bill, Richie, Terry, Scott and Dipper are finished with spreading the gravel forming the floor of the kiosk that will emerge in the ensuing weeks. |
 |
| A look eastward: the footings indicate where the welcome kiosk will be located. Beyond there Saltery Bay Main, also called Rainy Day Lake Main heads up to the left, while the spur to the right leads down into the bay at the mouth of Saltery Creek. There a foot bridge spans across the creek and the trail begins its winding 180 km toward Sarah Point in Desolation Sound. |
 |
| Back in town a few weeks of pre-manufacturing the timber structure has been complete and the crane loads all materials onto the flat-bed. Then the truck transports them out to Saltery Bay, and lifts the timbers into place. |
 |
| With help like that the crew is making rapid progress in the erection of the timbers. |
 |
| Jim makes sure the post is plumb while the crew is joking around again. |
 |
| The first beam is fitted onto two posts. |
 |
| Don guides the cross-member into place. |
 |
| Dipper helps guide another piece of the puzzle. |
 |
| Craig and Don fit the king post into the holes. |
 |
| It's not even lunch yet, and things are shaping up. |
 |
| Now the ridge board is up. |
 |
| And before you know it the rafters have been installed. |
 |
| The first tongue and groove 2x6 are nailed to the rafters. |
 |
| Richie is drilling a hole for a dowel. |
 |
| The crew has accomplished a lot for this day... |
 |
| ...and after cleaning up the site they pose for a group picture. |
 |
| On the next outing the sheet metal gets screwed down. |
 |
| Ray donated his time to get the roof up... |
 |
| ...including all the trim. |
 |
| Soon the display case and a new map with trail information and pictures of the huts will be installed as well. The welcome kiosk can also serve as an emergency shelter, in the event it is a rainy day and someone is waiting to be picked up. |
Monday, December 17, 2012
#9 Walt Hill Hut - Summer - Fall 2012
Walt Hill Hut? Well, YES! Our waiting was over at last. In mid-June the report hat come in that the last of the snow was disappearing off Walt Hill and would be gone in a few days. We jumped on it and began construction of wall panels in town.

 |
| First the framing |
 |
| Then sizing the plywood, applying and painting it. |
 |
| The proud crew relaxes at the end of a good day's work. |
 | |
| We had decided on a week that looked promising enough, and made the necessary arrangements, determined to spend a week on the mountain. Finally the day came to transport the materials and the camp kitchen and tents up onto Penstemmon Bluff on Walt Hill. We left town early and a cavalcade of vehicles including the building supply truck made its way up into the foothills into a site fairly close to Walt Hill from where the materials would be picked up by helicopter. |
 | ||||||||||||||||||||||
It didn't take nearly as long to unload the trusses as it did to wait for the clouds that shrouded the mountain to lift. It was a trying time, when we were wondering whether we would be even possible to get up the mountain on the day. What if the forecast was wrong and we had to camp out down below in the drizzle? At last, after hours and hours of waiting the clouds began to part, and some three dozen lifts later all the materials and the crew was up on the mountain. What a relief.
|


On day 2 we built the forms for the foundation and the temporary column supporters that will hold up the floor and the rest of the building until the cement has cured.
 |
| Here is a view eastward from the cabin site. In the foreground lies Horseshoe Valley with some of the lakes of the Powell Forest Canoe Route |
 |
| Dipper is leveling the cement in one of the pad forms. |
 |
| Don adds water to the Readimix in a tub and uses a hoe to mix cement and water. Bag by bag, tub by tub the mixing continues all day as we fill the forms and sono tubes. |
 | |
| Temporary support of two by four posts next to the newly filled tubes allow us to erect the floor as the cement hardens and cures. The temporary structures absorb all the weight until the last day of the expedition when these supports are removed and all the weight of the newly constructed shelter will be absorbed by the cement columns. After the floor, the various pre-fabbed wall panels are erected and the walls are rapidly taking shape. |
 |
| Looking good men, plumb, level and square. Next panel please. |
 |
| Now that's more like it. After a couple more hours the walls are up, one beam as well, upon which the trusses will rest. |
 |
| A well deserved break at the end of the day. The deck and the stairs are done. The posts and the beams are in place, and so is the scaffolding. |
 |
| The next steps are completing the scaffolding so we can start getting the trusses on top of the beams. |
 |
| One truss after another is heaved up, and tacked in place. |
 |
| The men are feeling good and are enjoying moments of levity while they are eating their snack. |
 |
| By the end of the day we put up tarps over the roof to keep the inside dry as it is threatening to rain over night. |
 |
| A drizzle next morning doesn't stop us. Terry and Richie are up on the roof with the ground crew supplying them with sheets of metal, tar paper and whatever else they need. Don is at the ready. |
 |
| All the metal sheets are installed and now it's time for the chimney. Installing the chimney now will allow us to put a pellet stove on the main floor. |
 |
| Jim and Richie are installing the double glazed windows. |
 |
| The loft windows are in place, and so is the door. |
 |
| Day 6 we are finished with the basic structure, and sit for a while to take a breather. And no sooner have we finished that the first overnight guests have arrived. Walt Hill Hut is ready to be used. It is not winterized, but it will certainly serve for keeping dry in case of rain. |
 |
| The outhouse was also pre-fabbed in the lowlands and flown up. |
 |
| Now there is nothing to do but pack up the camp kitchen, the tools, the tents and the gear, ready to have it flown out. Note that we left the scaffolding up. This will enable us to do the soffits later in the fall. |
 |
| We return to winterize the cabin a couple of months later. |
 |
| The soffits are installed and most of the scaffolding is removed. Some trim will finish the windows. |
 |
| Don and Dipper have put insulation between the joists and then covered it with plywood and battens to keep the cold and the critters out. |
 |
| Kerry pays attention to detail. The window trim is looking good. |
 |
| The 1x4 cedar tongue and groove siding looks very nice inside the cabin. |
 |
| Don and Dipper continue their insulation antics, now putting the bats between the rafters. Then they will move up into the loft to finish the insulating there. |
 |
| Jim, Kerry, Dipper and Eagle are calling it a day. |
 |
| The crawl space has also been closed in. All the trim is on the windows and the corners of the hut. It's a snug job, buttoned up. |
 |
| The kitchen corner inside is also finished... |
 |
| ...but the insulated upstairs will have to be finished on another outing. The boards are ready waiting to be installed next time we come up for a shorty expedition.. |
 |
| Meanwhile the last of the gear and the tools are gathered and Matt arrives with the chopper... |
 |
| and takes it and us away. |
 |
| But not before we say hello to another set of visitors and invite them in to enjoy their stay in the insulated and bug proof cabin. |
 |
| The hut seen from the air... |
 |
| and Matt the dashing pilot. |
 |
| On the next trip we finish the interior paneling in the loft and the various details that needed finishing. |
 |
| Jim, Don, Gord, Ken and Eagle finish tidying up around the outside and burn the odds and ends. |
 |
| View of the north side of the cabin with a sheltering wall on the porch to provide additional protection. |
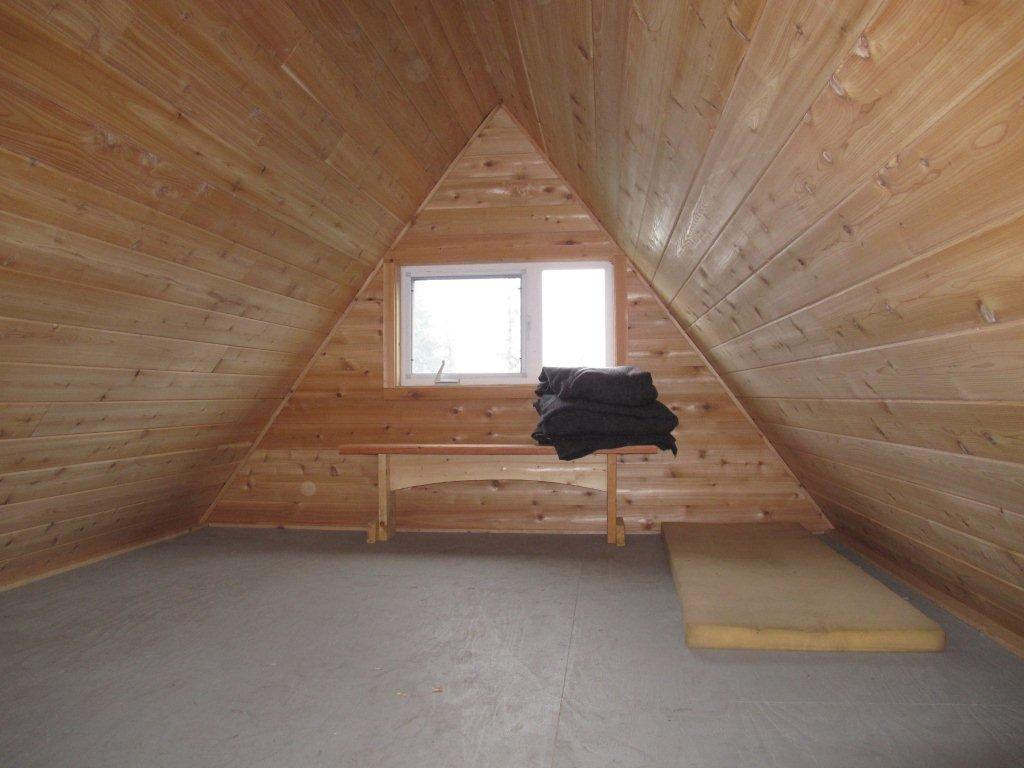 |
| The loft all done and ready for hikers. |
 |
| Jim is preparing our last lunch before we hike out and back down into Powell River. |
 |
| The funky railing provides an artistic touch. Don, Jim, David and Gord are ready to head out. Check out the trail description at the bottom of the home page that will tell you how to get there. |
 |
| One last look down at Lois Lake in the Horseshoe Valley. |
Subscribe to:
Posts (Atom)